Setup Guide

GT-MAX32

Welcome to GSI

Meet the GT-MAX32, designed with unwavering dedication for the no-compromises competitive sim racer. It encapsulates the spirit of a GT racecar while delivering exceptional performance, durability, and style. Our team's relentless efforts have been poured into every detail of this wheel, ensuring it not only meets but surpasses your expectations.

Section 1.0

GT-MAX32 Layout

Front

  1. LCD Touchscreen Display
  2. Hand-Laid Carbon Fiber Structure
  3. RGB LED Rev Strip + Side Indicators
  4. 7-Way Multi Switches (x3)
  5. Push-Button Rotary Encoders (x5)
  6. RGB LED Buttons (x12)
  7. Silicone Handles

Rear

  1. Shifter Paddles (x2)
  2. 70MM PCD Mounting (Optional AH50 Pictured)
  3. Clutch Paddles (x2 / Optional)
  4. Connector for GSI Coiled USB Cable

Section 2.0

Mounting to Wheelbase

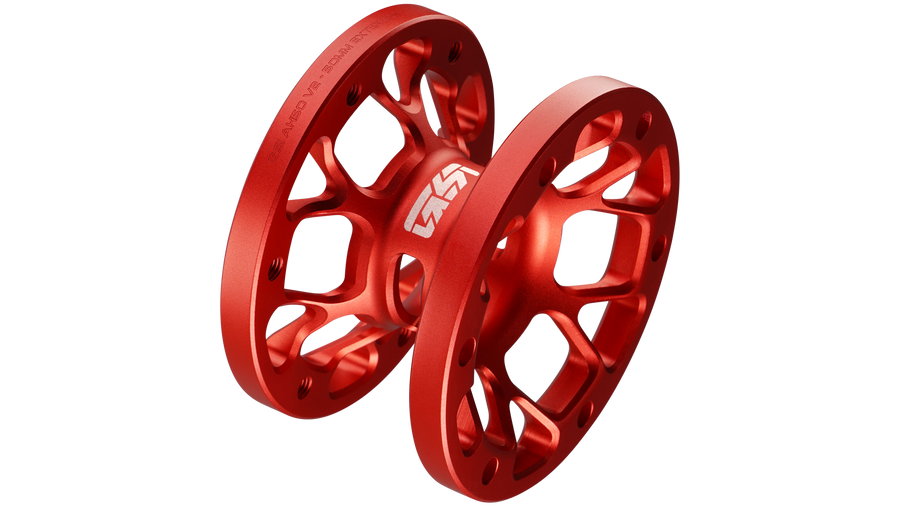
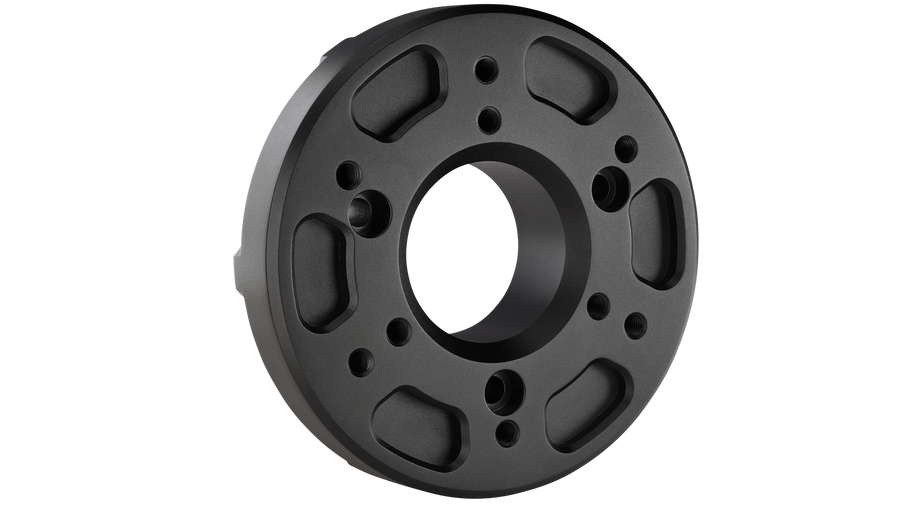
Each GSI wheel has a 70MM PCD (Pitch Circle Diameter). Most hubs that have a 70MM PCD will attach to the GT-MAX32. When possible, always use the non-threaded side of the hub to attach to the wheel body. If a hub needs to be attached via hub-side threads, you must use Captive Screws to prevent damaging the wheel and hub.

We recommend providing at least 50MM between the wheel and wheelbase to prevent the coiled USB cable from colliding with the wheelbase.

Section 2.1

MOUNTING WARNINGS

  • Never use regular screws to connect items (hubs, wheels, etc.) from thread to thread. Damage to the threads will occur! You must use Captive Screws to correctly secure two threaded items.
  • Do not use screws that extend more than 4MM past the hub lip when threaded. For example, GSI hubs have an 8MM lip, the wheel body is 4MM thick. In this case, the appropriate combined screw length would be 12MM. Any longer and you risk screwing into the PCB board of the wheel and destroying it.

Section 2.2

Hub Mounting

  1. AH50 Hub / AH100 Hub
    Place the non-threaded side of the hub on the back of the wheel body with the GSI logo facing up, and align the screw holes.
  2. M5 16MM Screws (Included)
    Thread the x6 included screws with a 4MM Allen key until they reach the base of the hub.
  3. GT-MAX32 Mounting Threads (70MM PCD)
    Tighten the screws in a star pattern using a 4MM Allen key.

Section 2.3

QRS-1 Mounting

  1. QRS-1 Wheel-Side
  2. Wheel-Side Screws (Included)
  3. QRS-1 Base-Side
  4. Base-Side Screws (Included)
  1. Detach the QRS-1 halves by squeezing the pull ring.
  2. Your wheelbase mounting solution will determine whether you use the included shorter or longer screws. Here are the most common configurations:

    Scenario #1
    BASE-SIDE: x3 Short Screws
    WHEEL-SIDE: x3 Short Screws

    Scenario #2
    BASE-SIDE: x6 Long Screws + x6 Nuts (if needed)
    WHEEL-SIDE: x6 Short Screws

    IMPORTANT: When mounting the QRS-1 wheel-side, never use the included longer screws or screws longer than 16MM to avoid damaging the internal electronics.

  3. With the wheelbase shaft centered, place the QRS-1 base-side with the text upright on your wheelbase mount and thread the appropriate length screw (we recommend using the SC2-X Adapter for Simucube 2 wheelbases).
  4. Place the QRS-1 wheel-side with the GSI logo facing up on the back of the wheel and align the screw holes, install the appropriate number of short screws only.
  5. Using the included Allen key, thread the screws down until they lay flush. Use the stubby end of the Allen key to tighten the screws.

Section 2.4

SC2-X Mounting

  1. SC2-X Adapter
    Before starting, ensure your Simucube 2 wheelbase is completely turned off and that all attachments are removed from the wheelbase. The pre-installed Simucube base-side QR should be visible with the logo upright.
  2. M5 30MM Screws (Included)
    Using a 4MM HEX Allen key, remove the x3 pre-installed screws from the Simucube base-side QR. Align the SC2-X Adapter to the wheelbase shaft screw holes and install with the provided screws.
  3. QRS-1 (Base-Side) - Reference Only
    Once the SC2-X is installed, you'll be able to install accessories to your Simucube like the QRS-1, or other 70MM/50.8MM PCD QRs, hubs, etc.
  4. QRS-1 (Base-Side Screws) - Reference Only
    DO NOT use screws that travel more than 5MM past the lip of accessories you are attaching to the SC2-X to avoid damaging the adapter, and to ensure they can be tightened securely.

Section 3.0

Software Setup

Download and install the following software:

1. Download simOS
2. Download SimHub

Section 3.1

USB CONNECTION

Before proceeding, we highly recommend using the following connection method:

  • GSI Coiled USB Cable → Powered USB Hub → PC

Using a power-injected USB hub to connect the wheel to your PC helps prevent connectivity issues by providing additional power to run the display and LEDs.

Section 3.2

Connect to PC

  1. GSI Coiled USB Cable (PC-Side)
    Ensure your powered USB hub is connected to your PC and power source, then connect the cable to the powered USB hub.
  2. GSI Coiled USB Cable (Wheel-Side)
    Connect cable to wheel, ensuring the keyed portion lines up with the connector in the wheel (see Step 3).
  3. Keyed Connector
    The wheel-side of the cable has a small notch. Ensure this notch is oriented at the top so it easily connects to the wheel. Thread the metal coupling to the wheel until snug.
  4. Launch simOS and go to: All Devices > GT-MAX32. If available, update your wheel firmware to the latest version.

Section 3.3

SimHub Setup

Download SimHub and follow the installation instructions.
Once installed, open SimHub and follow the steps below.

Add Device

  1. Go to Devices
  2. Click Add device

Select GT-MAX32

  1. Click Gomez Sim Industries in the side panel menu
  2. Select GSI GT-MAX32

Select Profile

Select one of two profiles:

  1. Easy Profile
    Easily control wheel LED colors via SimHub. This profile combines LEDs into selectable groups (4 per button/rotary). This profile will be highlighted as 'Recommended'.
  2. Advanced Profile (GSI LED profiles)
    Control each LED individually (88 in total) for limitless options. You are required to use this profile when using custom GSI LED profiles.

Note: You can change profiles at anytime by deleting and re-adding the device. Please note this will delete any customizations you have previously made. You can export device settings at the top of the device's page to save your customizations.

Dash Setup

Before you continue, download and install the GT-MAX32 Dash.

  1. Open SimHub and go to: Devices > GT-MAX32 > LCD.
  2. Under Displayed dashboard, change to GSI GT-MAX32.

LED Setup

Select and download an LED profile type, or download them all and use your favorite.

Gradient Profiles:

  • Scarlet
  • Sable
  • Phantom
  • Prime
  • Sunkissed
  • Miami
  • Suzuki

Download

Base Profiles:

  • Scarlet
  • Sable
  • Phantom
  • Prime

Download

  1. Go to the LEDs tab.
  2. Click Profiles manager

Import LED Profiles

  1. Click Import profile

Select LED Profiles to Import

  1. Select one or all downloaded LED profiles to import.

Activate LED Profile

  1. Select the profile your would like to activate and click LOAD.

Enjoy your GT-MAX32

SETUP COMPLETE

If you have any questions, chat with us on Discord community or open a support ticket.

Section 4.0

simOS Overview

Device Info
View general information about the wheel being used. Click to view the: model, mainboard serial number, and update firmware.

Clutch Modes

  • Calibration
    simOS calibrates the clutches automatically.
  • Dual Clutch
    Used to help get the fastest launches off the line. Used in conjunction with the ‘Set Bite Point’ and ‘Set Master’ settings. The ‘Master’ clutch will have full range of the clutch, while the secondary clutch will only engage until the specified ‘Bite Point’.
  • Launch Control
    Like the Dual Clutch mode, but with a twist: each clutch will have full range if used on their own, but engaging both clutches fully will set the clutch that’s released first as ‘Master’ and make the remaining clutch the secondary clutch which will only engage until the specified ‘Bite Point’.
  • Gas and Brake
    Enables the clutch paddles to be mapped as separate inputs, usually used for Gas and Brake.

Bite Point
Sets the maximum percentage of the secondary clutch (left clutch by default). While stationary in the simulator, pull the secondary clutch and fully depress the accelerator pedal until the vehicle starts moving forward. Adjust the bite point by dragging the slider and pressing ‘Set Bite Point’ and retest until you are satisfied with the launch.

Set Master
By default, the Master Clutch is set to the right clutch. If you prefer to use the left clutch as the master, select ‘Left’ and click ‘Set Master’. The current Master Clutch is defined at the top right corner of the application.

Encoder Settings
This setting changes when input signals are sent when using the button function of the front rotaries. By default On Push makes rotaries act as regular buttons, where pressing and holding will report the active state of the rotary button (pressed or not pressed).

When set to On Release, a pulse input is only sent once the rotary button has been released and when the rotary has not been turned. Enabling this setting enables a secondary layer to the rotary function by allowing you to press and hold, then turn the rotaries - effectively making each rotary a 5-way input.

About
View the current version of simOS.

Section 5.0

Cleaning & Maintenance

Shifter Maintenance

GSI Shifters come pre-lubricated from the factory. With extended use, you will need to re-apply a small amount of PTFE lubricant in the specified locations (see image) to keep them working at their best. DO NOT use spray lubricants, and DO NOT use excess lubricant. Be cautious during application and do not get it onto other parts of the wheel.

  1. Lubricant Area #1
  2. Lubricant Area #2

Clutch Maintenance & Adjustments

  1. Maintenance
    GSI Clutches may need to have PTFE lubricant applied to the spring resting points inside the clutch housing in order to keep the actuation smooth.
  2. Adjustments
    Using a 2MM HEX Allen key with a stubby end, loosen (but do not remove) both screws on both ends of the clutch to until you can freely move the retention paddle. Set the retention paddle to a position that feels comfortable to you and then retighten both screws.

General Cleaning

  1. Before cleaning, unplug the coiled USB cable from the wheel.
  2. Use a soft microfiber towel to gently wipe the display, button caps, and aluminum body. For tougher grime or dirt, use 99% isopropyl alcohol. Use a soft detailing brush to remove debris from hard-to-reach areas.
  3. Be careful not to apply too much pressure on the labels as this may damage the matte finish.

Label Cleaning

  1. Use a cotton swab dipped in 99% isopropyl alcohol to clean the labels.
  2. Gently brush the surface of the labels with the dampened cotton swab and use the dry side to absorb any excess alcohol.
  3. This helps to prevent drying spots from forming on the labels.

Label Maintenance

  1. To remove minor surface blemishes from the labels, use a heat gun at 38°C (100°F) from a distance of about 30 cm (1 ft) while continuously moving around the label.
  2. Avoid applying too much heat to the wheel face, as this may damage the labels/buttons.

Label Replacement

  1. To replace the labels, use a 1.5mm HEX screwdriver to remove all 3 multi-switches. Locate the screw hole underneath the ‘G’ logo and partially unscrew it until the switch can be lifted up from the wheel face.
  2. Set the multi-switches aside, leaving the screws in until it’s time to reinstall them.
  3. Carefully remove the labels with your fingernails or soft plastic tweezers to avoid damaging the carbon fiber plate.
  4. If any adhesive residue is left behind, use the sticky side of the removed labels to repeatedly stick and unstick the surface to lift the leftover adhesive.
  5. Alternatively, use a cotton swab dampened with acetone and move it in circular motions. However, be cautious when using acetone as it is a volatile compound and should be handled with care by an adult.

Section 6.0

Troubleshooting

For proper operation, you need to have a clean, reliable USB data throughput signal and the absence of EMI (Electro Magnetic Interference) from other devices. 

  • Connect wheel via a powered USB hub or directly to computer. 
  • Avoid excessively long USB extension cables. Data degrades on longer USB extensions.  
  • AMD systems with widely known poor USB performance update to AGESA bios 1.2.0.2 or higher. (check your motherboard manufacturer website)
  • Check for EMI (Electro Magnetic Interference) and ground rig if needed. 
  • Try alternate USB ports if one port is not performing to spec.
  • Check coiled cable to make sure cable housing is screwed on tight. 
  • USB shares data throughput with all devices on the system. Make sure you are not overloading the USB tree. 
  • Use a dedicated PCIE USB card. (We recommend NEC chipset cards)

Section 7.0

Safe Usage & Warranty

For more information, read the full Terms & Conditions.

Warnings & instructions for safe usage

  • WARNING: CHOKING HAZARD - Small parts, adult supervision required! Never let children use the GSI steering wheel, or any of the provided parts or tools without supervision by an adult.
  • Never use damaged or in any way defective product, stop using it and contact the reseller or the manufacturer.
  • Use protective gloves when changing or adding parts to the steering wheel, or when removing parts from it.
  • Always make sure everyone using the GSI steering wheel have read and understood the content of the manual above.
  • Always check that all connections and quick releases are tightened before using the steering wheel.
  • DO NOT open the steering wheel.
  • The GSI steering wheel or any of its parts may not be used for any other purpose than what they were designed for. GSI products are meant to be used as an USB-input device on a computer. DO NOT USE IN A REAL CAR! The manufacturer is not liable for any damage that may result from using the product in violation of the instructions.
  • Always fasten the GSI steering wheel to the direct drive base with M5 bolts (6 pcs). It is the user's responsibility to ensure that the platform can withstand the use of the GSI steering wheel.

Operating environment and safe storage conditions

  • 15°C – 35°C temperature, non-condensing humidity.
  • Do not expose the GSI steering wheel or any provided parts to direct sunlight or moisture.
  • Indoor use and storing only.

Warranty
The product has a 1-year warranty, excluding situations and events where:

  • Instructions for use or care have been disregarded.
  • The product has been used incorrectly or carelessly.
  • An accident or other event has occurred after the product has been handed over, in which the product has been damaged by external factors.
  • Normal wear and tear in use.

CE-Marking
Product meets EU standards for health, safety, and environmental protection.
Manufacturer: Gomez Sim Industries LLC
Manufacturer address: 1167 Mississippi Ave #100, Dallas, Texas 75207

Contents